


How I Built a Budget-Friendly Custom Mechanical Keyboard (Part 2 - Building It Together)
6th July 2025 • 15 min read — by Aleksandar Trpkovski
Play audio summary
If you've landed here and haven't read Part 1, I highly recommend checking it out first. That's where I laid the groundwork — diving deep into keyboard sizes, keycap profiles, switch types, and all the essential components that make a mechanical keyboard feel just right.
Now comes the exciting part — putting all that knowledge to use! This is where things get real. We're going to build a custom mechanical keyboard from scratch that's budget-friendly, beginner-friendly, and still super satisfying to type on.
Whether this is your first build or you're just curious about the process, I'll walk you through everything step by step. From unboxing the parts to installing switches, lubing both switches and stabilisers, mounting keycaps — and even doing a few fun mods to improve sound and feel — it's all here.
Let's get our hands dirty and start building our dream keyboard.
The Parts I Picked (And Why)
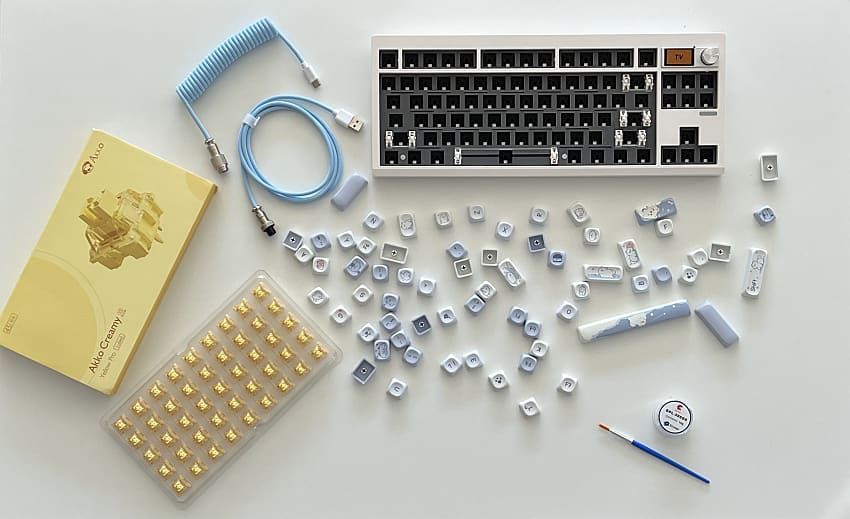
I wanted to build something that wouldn't break the bank but would still feel amazing to type on and look great on my desk. I'll walk you through all the components I chose, including where to buy them and how much they cost. I'll also cover some optional modifications that can improve your typing experience and sound quality. Here's my complete parts list:
Essential Parts
- Barebones Kit: GMK87 TKL Wireless Mechanical Keyboard – This keyboard is incredibly budget-friendly for the features it offers. At just $69.99, it's one of the best value kits out there. The GMK87 uses a Tenkeyless (TKL) layout with a lightweight plastic case that helps achieve that sought-after thocky sound more easily. It supports both Bluetooth and wired connectivity and includes a hot-swappable PCB, allowing you to install your own switches with ease.
It also features:
- 85 keys
- A volume control knob
- A programmable LCD screen (we'll explore how to customise this with our own animation later!)
- Pre-installed, pre-lubed plate-mounted stabilisers (which we'll improve even more with extra lube)
- A gasket-mounted structure that provides a softer typing feel and reduces vibrations
- Sound-dampening foam for a better acoustic experience
It comes in four color options: Toffee, Pastel Green, Black, and White. I went with the White version for a clean aesthetic.
- Switches: Akko V3 Creamy Yellow Pro (90 pcs) – These are an excellent option for anyone looking to build a smooth, responsive keyboard without spending a fortune. For just $17.98, you get 90 linear switches with a 50g actuation force — perfect for beginners or anyone who doesn't want to press too hard while typing. They come factory-lubed, but I'll be lubing them myself for an even smoother and quieter experience.
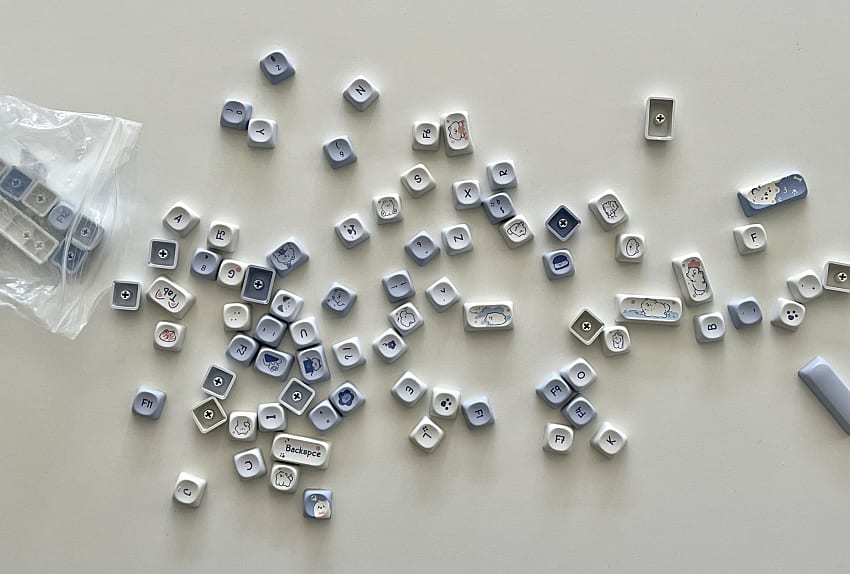
- Keycaps: Budget XDA PBT Set from AliExpress – Clean, minimalist, and surprisingly high quality for just $26.33. This particular set comes with 95 keys and features adorable cat and dog illustrations, adding a playful touch to the build. Made from durable PBT plastic, they're built to last. I chose the blue and white combo, but other color options are available too.
💸 Total Cost: ~$114.30 USD
Of course, the price may vary depending on your country, taxes, and shipping fees — but considering that many prebuilt keyboards with similar features can cost the same or even more, this is a fantastic deal. For example, the Keychron K8 with a similar layout and feature set costs around $179 USD.
Note: Prices mentioned are accurate as of May 2025 but may change in the future.
Optional Add-ons to Improve Sound & Typing Feel
- Lubing Supplies – Krytox 205g0 for switches and dielectric grease for stabilisers. Krytox 205g0 is a favourite in the mechanical keyboard community. It costs about $23.70 for 10g, but a small amount goes a long way — I've used it on three sets of switches/stabilisers and still have about half left. Just make sure to get 205g0, not other Krytox variations, as it's ideal for linear switches.
- Tools – You'll also want a switch opener, a small brush for lubing, and patience (lots of it 🙂). You can find these tools cheaply on AliExpress—just search for lubing switches kit. They cost around $10 and are a one-time investment since you'll use them for other switches in the future. They don't expire 😜!
- Switch Films – Optional, but they can tighten up the switch housing and enhance the sound. These are available on AliExpress and cost as little as $5 to $10 per 120 pieces.
- Mods – Synthetic filling (commonly known as fiberfill or Poly-Fil) inside the case and tape for the back of the PCB (for the "tape mod") can make a noticeable difference in acoustics and feel. These materials can be found at local hardware stores, craft shops, or office supply stores in most countries.
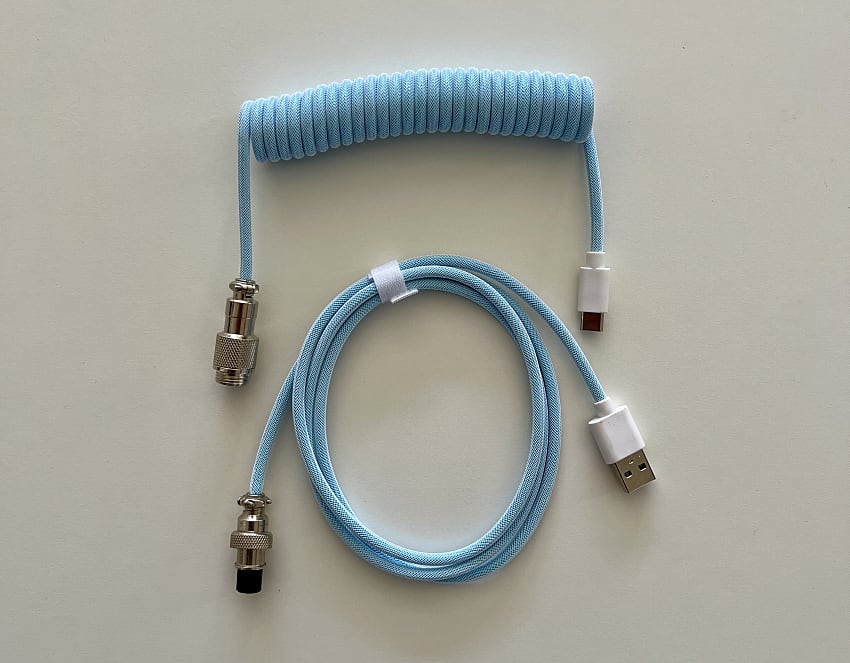
- Coiled cable – I chose a light blue coiled cable to match the keycaps from AliExpress. A coiled cable not only looks good but also helps keep your desk tidy by preventing excess cable clutter. It doesn't need to be expensive — you can find a USB Type-C cable for as little as $10.
Prepping the Stabilisers
Stabilisers sit under your bigger keys (like spacebar, Enter, Shift) and keep them from wobbling or sounding rattly. Lubing the stabilisers is a tiny mod, but it makes a huge difference in how your larger keys such as spacebar or Enter key feel.
Before I walk you through how I did it, I should mention that stabilisers need to be carefully detached from the board if they come pre-installed in the barebones kit (which is the case with our kit). Also, every barebones kit is different and needs a different approach to remove stabilisers. What works for this board might not work for others.
We first need to reach the stabilisers, which means opening up the keyboard case. Here's how I did it, and what you'll want to watch out for:
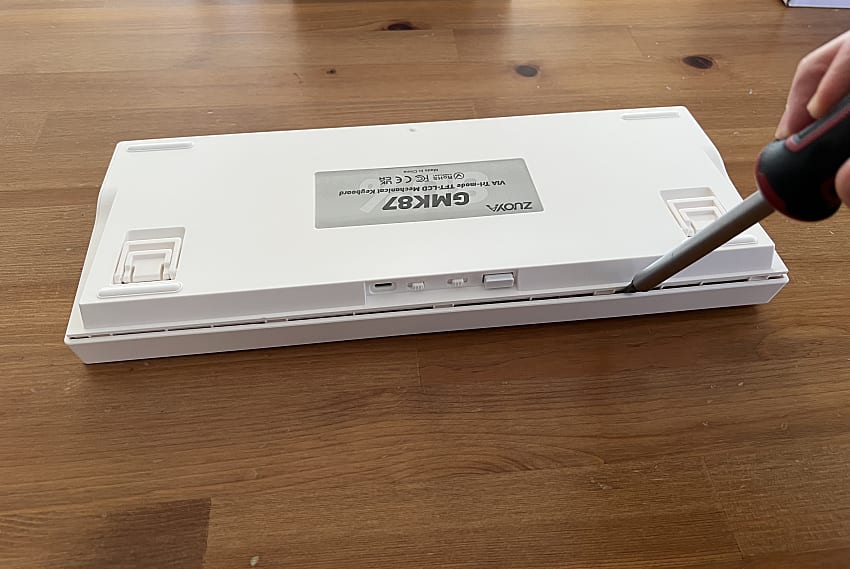
Opening the Case
There were no screws on my GMK87 — the entire case is held together by friction clips. To open it:
- I used a flat-head screwdriver (not a cross-head/Phillips) and gently inserted it into the seam between the top and bottom case halves.
- Then I applied a bit of upward pressure to pop the clips open — carefully working my way around the edges.
Tip: Be patient and go slow to avoid damaging the plastic.
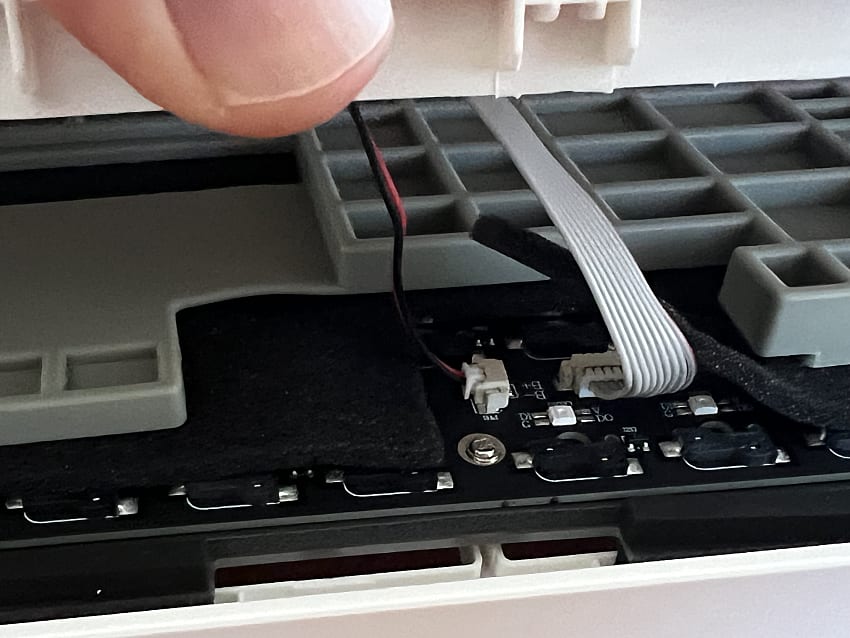
Once the top comes off, you'll notice two cables inside — one for the LCD screen and one for the knob. Carefully unplug both connectors before separating the case completely.
Inside the Case
With the case open, you'll see the build structure consists of multiple layers:
- Top case
- Silicone pad – dampens vibrations and reduces hollowness.
- Plate foam – helps with acoustics and overall sound profile.
- PCB – the main board that registers keystrokes.
- Switch plate – holds the switches firmly in place and affects how the keyboard feels when typing.
- Bottom case foam – adds even more dampening to the sound.
Honestly, I was pleasantly surprised — the out-of-the-box sound treatment in this keyboard is quite good. But don't worry, we'll still take it further with some extra mods later.
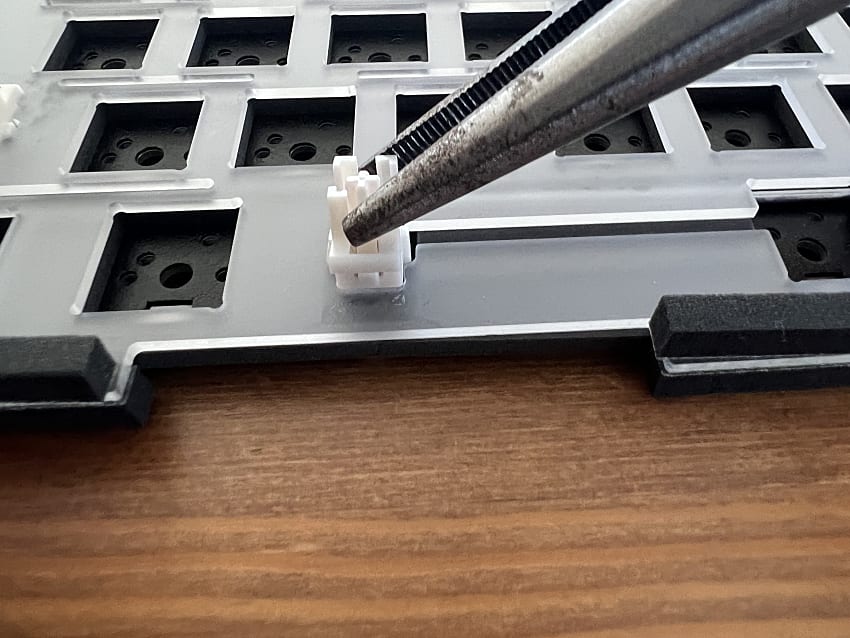
Removing the Stabilisers
Now that the PCB and plate are exposed, we can remove the stabilisers. These are plate-mounted and secured using plastic clips on both sides.
Here's how I removed them:
- I used a pair of long-nose pliers to gently press in the clips on each side of the stabiliser.
- Once the clips were pressed, I carefully pulled the stabilisers out from the plate.
Tip: Take your time and don't force it — the plastic can crack if you go too hard.
Once you've got the stabilisers out, it's time to give them the love they deserve — let's lube!
Lubing the Stabilisers
When lubing stabilisers:
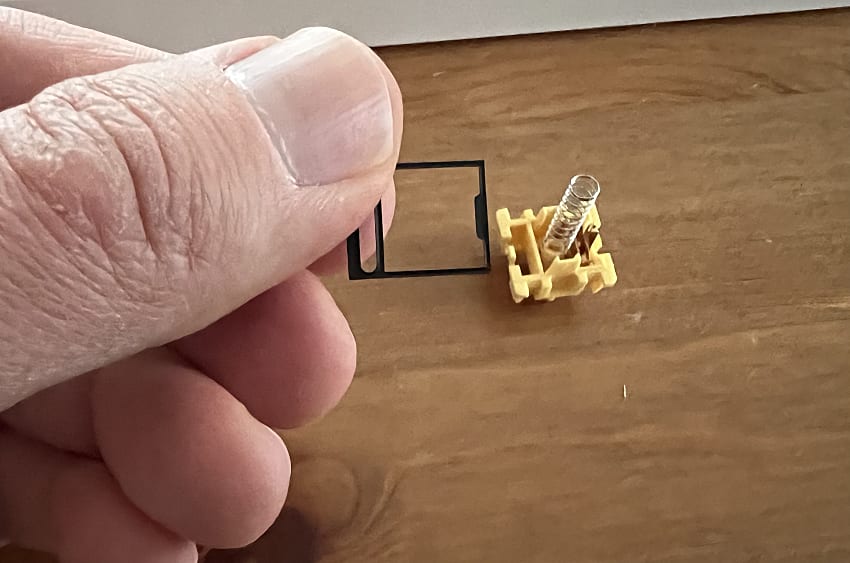
- First, remove the plastic housings from both ends so you can fully access the wire.
- Apply a small amount of dielectric grease to the ends of the wire.
- Use a fine brush or toothpick for a clean and precise application.
- You can also lightly coat the inside of the housing where the sliders move.
- Once lubed, reassemble and reinstall the stabilisers by pressing them gently back into place on the plate until they snap in securely.
Modding the Case
While the board is still open, we can make a few simple tweaks to improve the overall sound and typing feel. These mods are entirely optional, but if you're a fan of that deep, clean "thock" sound, you'll definitely want to try them.
Here's what I did:
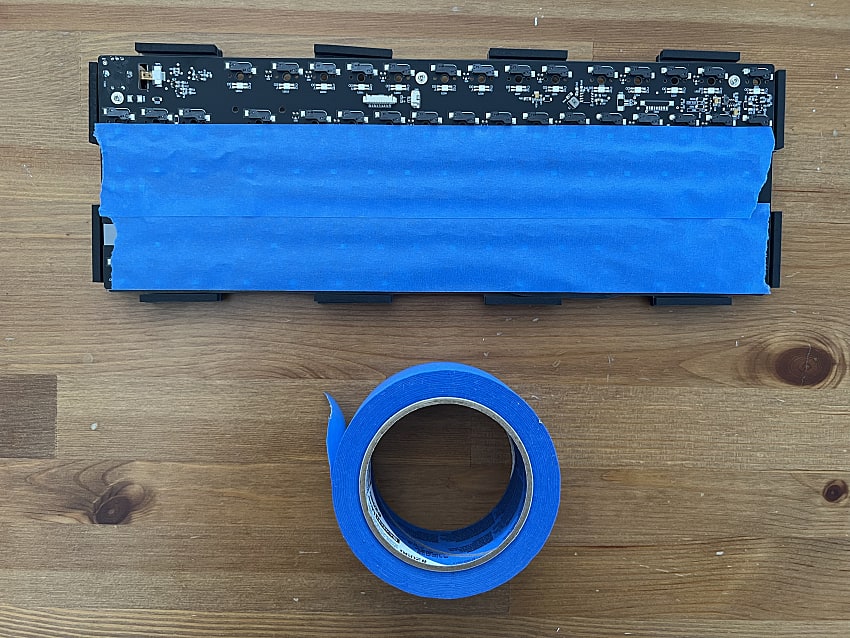
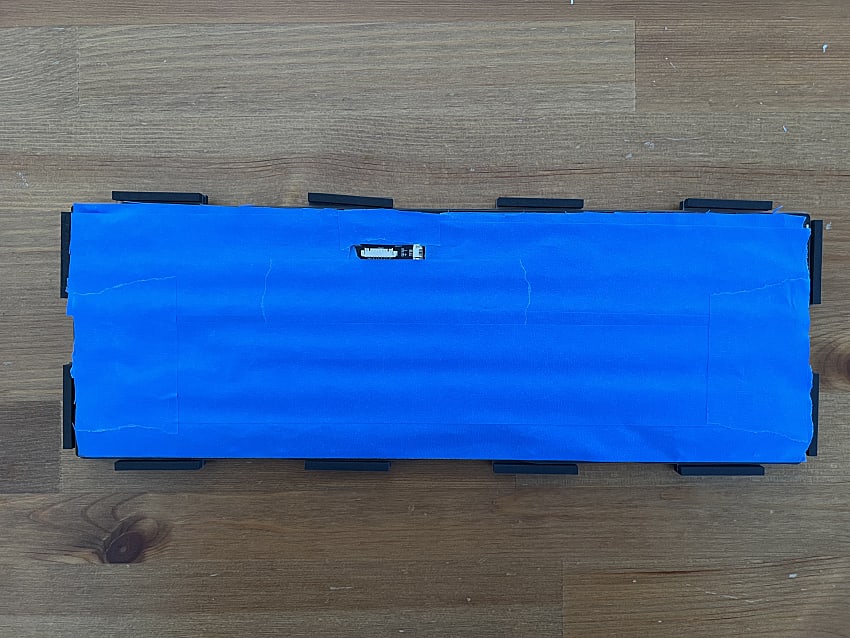
- Tape Mod – I applied three layers of masking tape to the back of the PCB. This mod is extremely popular in the keyboard community because it makes the board sound deeper and more refined when typing. Just make sure the tape doesn't cover any important components or connectors.
- Case Stuffing with Poly-Fil – To reduce empty space and eliminate hollow sound, I added some synthetic stuffing (Poly-Fil) between the PCB and the silicone pad. This soft material fills the space without putting pressure on components, and it really helps tighten up the sound profile.
These two quick mods made a noticeable difference—the keyboard now sounds deeper, more solid, and much less plasticky. We can now close the case as it was before.
Lubing Your Switches (Optional but Worth It)
This step is technically optional, but if you're chasing that buttery, "thocky" perfection, lubing your switches is 100% worth the extra effort.
How I lubed mine:
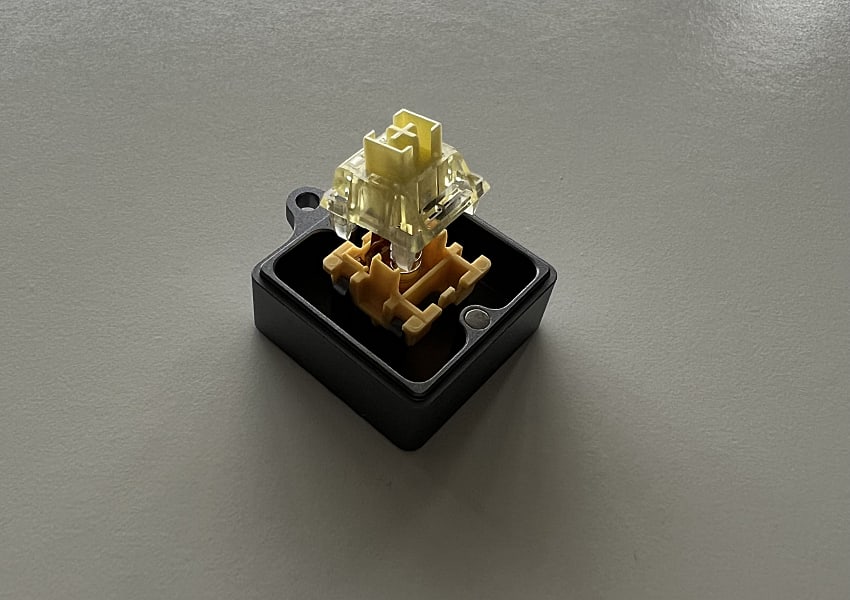
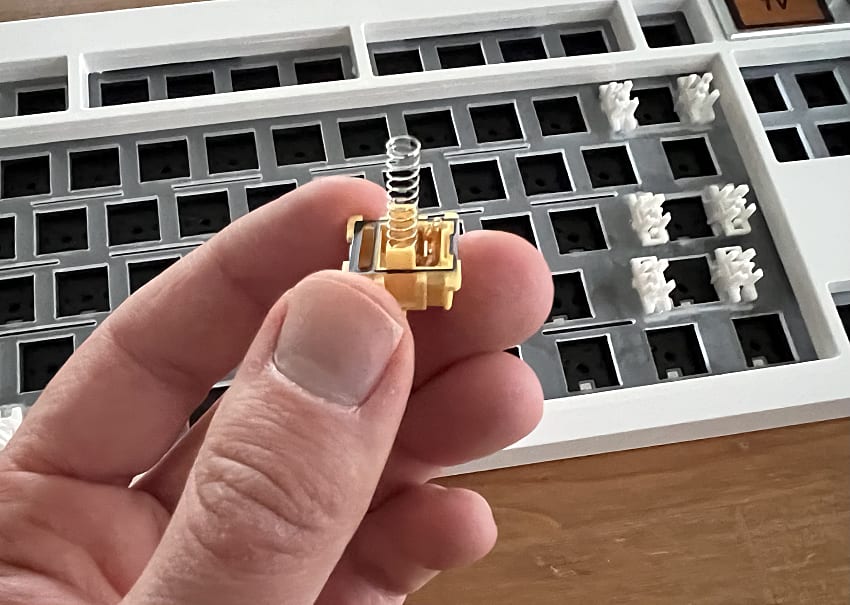
- I opened each switch using a switch opener (you can also use a flathead screwdriver in a pinch, but the proper tool makes life easier).
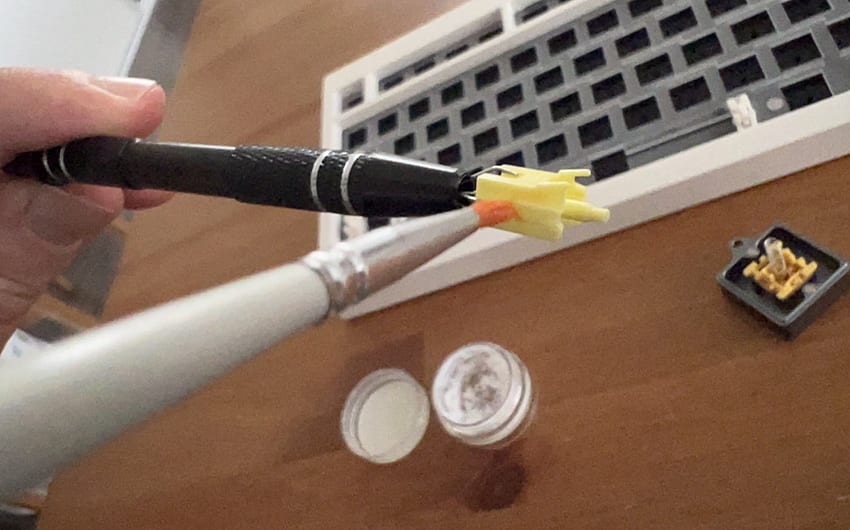
- I applied a thin layer of Krytox 205g0 to the stem rails, spring, and bottom housing, being careful not to overlube. A light coat is all you need.
- Before closing the switch, I also added switch films between the top and bottom housings. As mentioned earlier, switch films help tighten the housing, reduce wobble, and give the switch a cleaner, more consistent sound.
- Once everything was lubed and the films were in place, I carefully reassembled each switch and set them aside, ready for installation.
The process is repetitive but oddly calming. It took about 1 hour for 15 switches, but it's surprisingly relaxing. I put on a podcast and just zoned out. The final result made the keyboard feel and sound so much better.
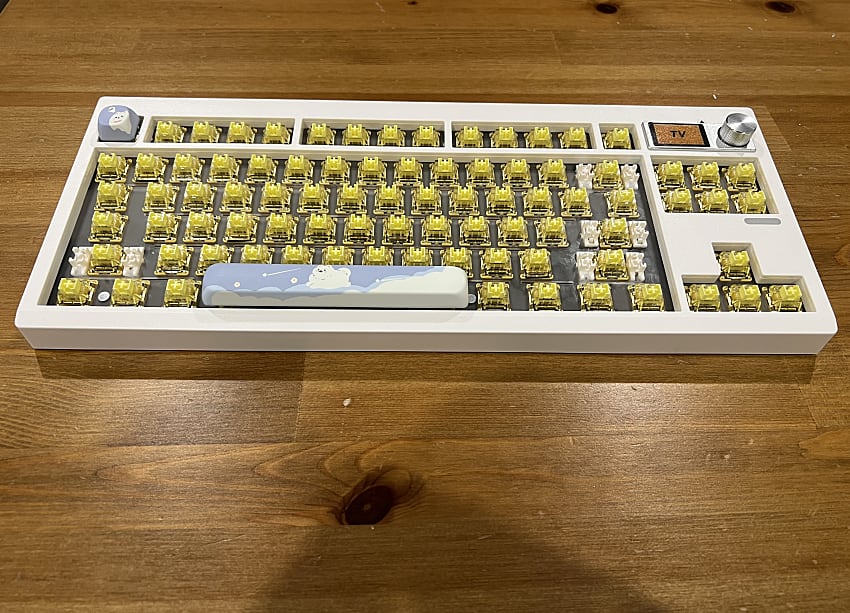
Installing the Switches
It was finally time to start putting everything together. Here's how I approached it:
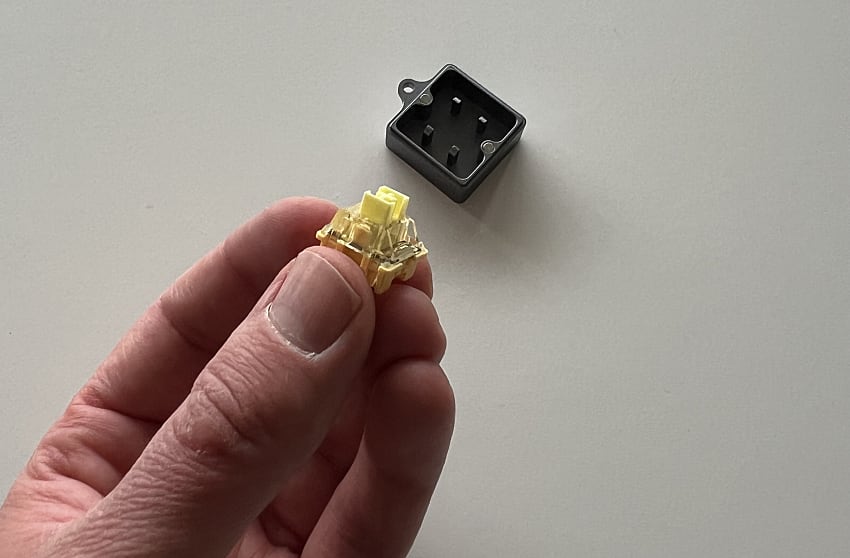
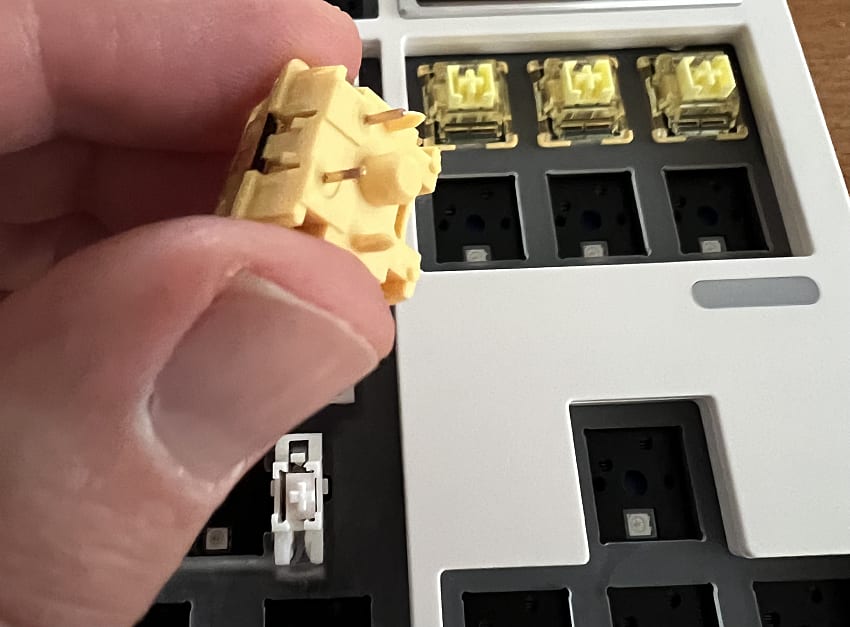
- Line up the switch pins carefully with the holes on the PCB. Make sure both metal pins are straight and facing downward before applying any pressure. You'll feel a soft "click" when they snap into place.
- Be gentle—don't force it. If you push too hard or at the wrong angle, you might bend the pins. Bent pins are the most common cause of dead or unresponsive keys. (If that happens, don't worry—they're usually fixable with a steady hand and tweezers.)
- As you go, take a moment to check that each switch is seated evenly and fully pressed in.
Once all the switches were installed, I gave the board a final visual inspection to ensure everything was aligned properly.
Adding Keycaps
This is the step where your keyboard really starts to come to life.
Installing keycaps is a pretty straightforward process:
- Press them on row by row, making sure each one clicks firmly onto the switch stem.
- Since we're using XDA profile keycaps, we don't need to worry about row-specific placement—they're uniform in shape and height. The same would apply to DSA profile caps as well.
- However, if you're using a sculpted profile like OEM, Cherry, or SA, make sure you're placing each keycap on the correct row. Putting sculpted keycaps in the wrong position will not only look off, but it can also feel uncomfortable when typing.
- If you're not sure what keycap profile you're using, or how profiles work, I covered that in detail in Part 1 of this blog series—feel free to check that out for a quick refresher.
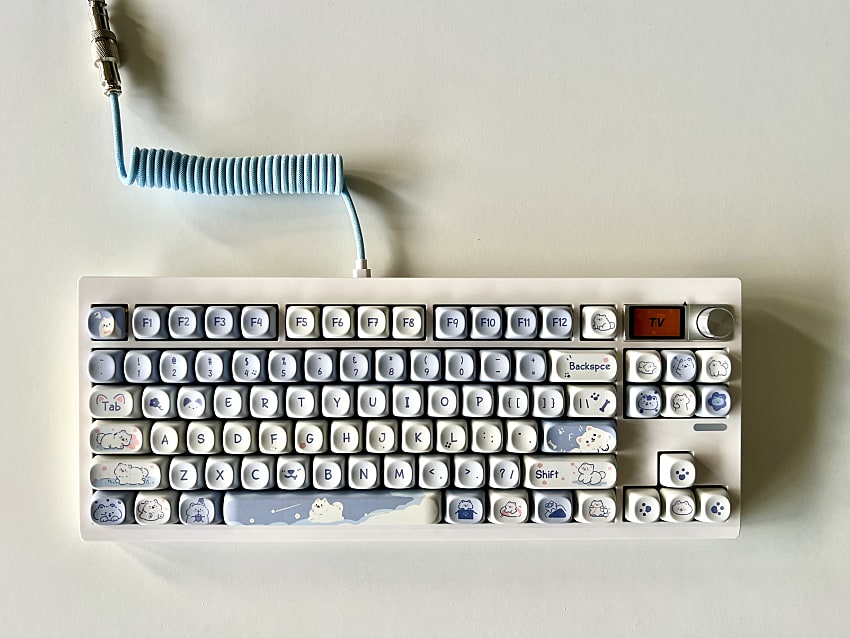
Once all the keycaps are on, give the board a gentle press test—every key should feel secure and snappy. It's a great moment to admire your build before the final step.
Up next: plug and play. Let's power it on and see how it performs!
Plug It In & Test It Out
Now that the keyboard is fully assembled, it's time for the most exciting part: powering it on and seeing it in action!
First, plug in the cable. The keyboard comes with a standard USB-C cable, but since I'm a big fan of coiled cables, I decided to swap it out for a budget-friendly coiled one that matches the board's aesthetic. (Totally optional—it's more of a visual upgrade.)
Coiled cables usually come in two parts: the spiral coil and a straight section, connected by a metal aviator connector, which gives it that premium custom look.
A quick note before powering on:
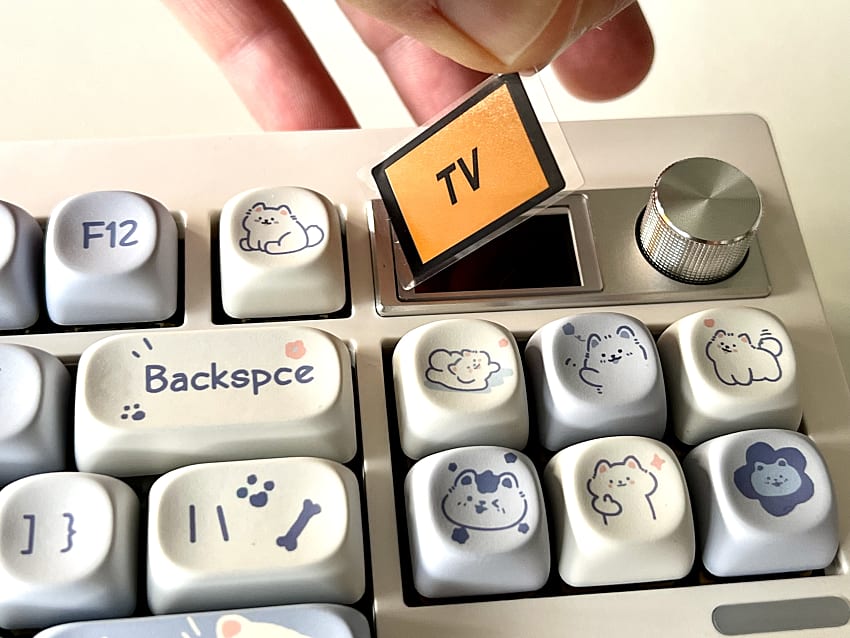
Don't forget to remove the protective film on the little LCD screen in the top-right corner, right next to the knob. It's easy to miss.
This particular board has a few cool screen features built in:
- It can display the current time.
- There are two built-in GIF animations to choose from.
- You can even upload your own custom animation through software—which is a fun way to personalise your board even further.
In my experience, the only software available was for Windows, despite what the keyboard documentation stated. I couldn't find any reference to Mac software. If you happen to find software that works on Mac for customsing the GIF animation, please email me.
RGB Backlight Features
The GMK87 also comes with customisable backlighting, including:
- Adjustable brightness and animation speed
- Multiple lighting effects (breathing, wave, ripple, etc.)
- Full control over hue, saturation, and colour mode
Feel free to play around with the settings to match your mood or setup.
Once I had everything plugged in, I ran a quick switch test and... wow. The keyboard felt and sounded exactly how I'd imagined—thocky, crisp, and smooth.
Mission accomplished. 🎉
Final Thoughts—You Built a Keyboard!
Congrats—you just built your own custom mechanical keyboard!
It's one thing to buy a keyboard off the shelf. It's another thing entirely to build one with your own hands, tweak it, mod it, and make it yours. And the best part? You can always improve it. Try different switches, keycaps, or foam mods—your journey is just beginning.
If you've been thinking about doing your own build, I say go for it. Start small, experiment, and don't worry about getting everything perfect the first time. That's half the fun.
Let me know if you want help tuning the final sound, picking your next switch set, or diving deeper into more advanced mods (like case foam or custom firmware). I've got plenty of keyboard rabbit holes we can explore together.
Further Reading
Explore more articles that might interest you.

