Making a Face Follow Your Cursor with AI‑Generated Images
20th December 2025 • 12 min read — by Aleksandar Trpkovski
Play audio summary


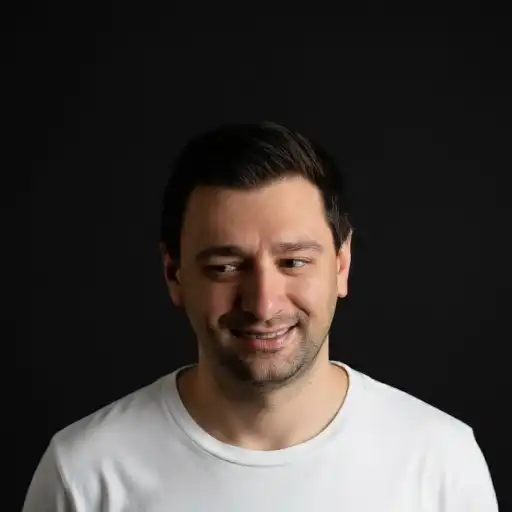


Move your mouse around to see me follow!
This idea isn't my original invention. I discovered it while scrolling through X and saw Wes Bos share a cool video of a face that follows your cursor around the screen. It caught my attention right away.
- Here's the video Wes posted: Watch on YouTube
- And here's his GitHub repository if you want to dive into his code: wesbos/eye-ballz
In his post, Wes mentioned that he got the inspiration from Kylan O'Connor, who was the first person to implement this interactive face-tracking effect on his personal website.
- Check out Kylan's website here: kylanoconnor.com
- Follow him on Twitter/X: @kylancodes
So what's my contribution? I put my own spin on it. I didn't follow the provided code examples - I prefer building things from scratch. I ended up with a very similar result.
In this post, I'll walk you through exactly what I did and why I did it this way.
The Idea
Let me break down what we're trying to accomplish. The goal is to create an interactive experience where a face (in this case, my face) tracks and follows the user's cursor as they move their mouse around the screen. Here's how it works:
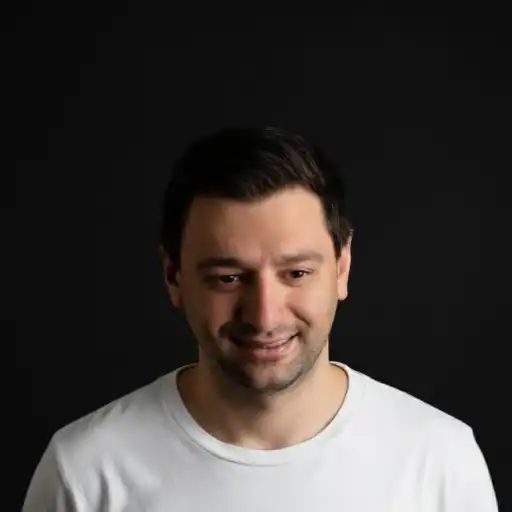
- We start with one photo of a face - ideally a clear, well-lit shot where the person is looking straight at the camera.
- We use an AI model to generate many variations of that face, each showing:
- The head tilted up or down at different angles.
- The eyes looking left, right, up, or down in various degrees.
- We download all those generated images locally to our machine.
- In the web browser, we write code that:
- Preloads all the images so they're ready to display instantly.
- Shows only one image at a time in the center of the screen.
- When the user moves their mouse (or tilts their device on a phone), the code calculates which direction they're pointing toward, picks the image that best matches that direction, and instantly displays it.
This approach uses no live AI processing in the browser - we're not running machine learning models on the fly. We're simply swapping between pre-generated images quickly, making the experience smooth and responsive even on slower devices.
The AI Model
To generate all these face variations, I used an open-source AI model called fofr/expression-editor. You can download and run it locally on your machine using Docker - though you'll need an NVIDIA GPU. If you want to go this route, I made a GitHub repo to help you get started with Docker more easily. Alternatively, you can use it hosted on a platform called Replicate, which is what I did for this article. It costs only $0.0015 per image generation. You can find the model's page on X here.
This model is specifically designed for editing facial expressions and orientations. Here's how it works - you give it:
- a base image URL (a link to a clear photo of your face),
- some numeric parameters that tell it how to modify the face,
- and it processes everything and returns a new image with those adjustments applied.
The model has many parameters you can tweak - you can make the person smile, wink, open their mouth, raise their eyebrows, and more. But for this project, I kept things simple and used only three specific parameters:
rotate_pitch– Controls how much the head tilts up or down. I used a range from -20 to 20, where negative values tilt the head down and positive values tilt it up.pupil_x– Moves the eyes horizontally, making them look left or right. I used a range from -15 to 15, where negative values look left and positive values look right.pupil_y– Moves the eyes vertically, making them look up or down. I used a range from -15 to 15, where negative values look down and positive values look up.
We're not going to generate images for every possible combination of values - that would create thousands of images! Instead, we'll generate a grid of strategic combinations by sampling values at regular intervals. Here's what I chose:
- For
rotate_pitch, I used five values:[-20, -10, 0, 10, 20] - For
pupil_x, I used three values:[-15, 0, 15] - For
pupil_y, I used three values:[-15, 0, 15]
If you do the math, that's 5 pitch angles × 3 horizontal eye positions × 3 vertical eye positions = 45 total images. That's a manageable number that gives us enough variety to create a smooth tracking effect.
Setting Up a Small Node.js Project
We're going to use Node.js to create a script that generates images with the AI model using the official Replicate package. Here's what you'll need to have installed:
- Node.js
- A Replicate account (it's free to sign up, but you'll need to set up payment details) and an API token, which you can get after creating your account and setting up payment.
Once you have those prerequisites ready, let's set up the project. Open your terminal, navigate to an empty folder where you want to work, and run these commands to initialize the project:
npm init -y
npm install replicate
npm install -D tsx @types/node
Next, we need to store our Replicate API token securely. We'll create a file called .env that stores our secret token. Run this command in your terminal (but replace your_token_here with your actual API token from Replicate):
echo "REPLICATE_API_TOKEN=your_token_here" > .env
Add the
.envfile to your.gitignorefile. This prevents your API token from being exposed if you push the repository to GitHub or share it publicly.
Now, let's add a convenient script to our package.json file that will let us easily run our TypeScript code. Open package.json in your text editor and add this inside the "scripts" section:
"scripts": {
  "start": "tsx --env-file=.env ./index.ts"
}
This script runs our index.ts file and loads the .env file without needing extra packages to handle that.
Generating All the Face Images with Node.js and Replicate
Now we get to the really exciting part - writing the code that will automatically generate all 45 variations of our face! Let's break this down into manageable pieces.
Defining the Parameter Grid
First, let's create a new file called index.ts in our project folder. At the top of this file, we'll define the sets of values we want to sample for each parameter. Remember, we're choosing strategic values rather than trying every possible number:
const pitchValues = [-20, -10, 0, 10, 20];
const pupilXValues = [-15, 0, 15];
const pupilYValues = [-15, 0, 15];
These arrays represent all the different angles and eye positions we want to generate. We'll loop through every combination of these values later.
We also need to specify where our base face image is located. Upload your face photo to an image hosting service - I used Cloudinary, but any service that gives you a direct URL will work. Then add this line to your code:
const IMAGE_URL = "https://your-image-host.com/path/to/your-face.jpg";
Replace that URL with your actual uploaded face photo. Use a clear, well-lit portrait where you're looking straight at the camera - this gives the AI model the best starting point for generating variations.
Connecting to Replicate
Now let's import the libraries we need and set up our connection to Replicate. Add these lines at the top of your index.ts file:
import Replicate from "replicate";
import fs from "node:fs";
import path from "node:path";

const replicate = new Replicate({
    auth: process.env.REPLICATE_API_TOKEN,
});
We import the Replicate library to communicate with the AI model, then create a new Replicate client and authenticate it using our API token.
Looping Over All Combinations
Next, we need to generate all possible combinations of our three parameters. Let's create a TypeScript interface to define what each combination looks like, and then a function that builds all the combinations:
interface ImageParams {
    rotate_pitch: number;
    pupil_x: number;
    pupil_y: number;
}

function getCombinations(): ImageParams[] {
    const combos: ImageParams[] = [];
    for (const pitch of pitchValues) {
        for (const px of pupilXValues) {
            for (const py of pupilYValues) {
                combos.push({ rotate_pitch: pitch, pupil_x: px, pupil_y: py });
            }
        }
    }
    return combos;
}
This function uses three nested loops to iterate through every combination of pitch, pupil_x, and pupil_y values. For example, it will create combinations like {pitch: -20, pupil_x: -15, pupil_y: -15}, then {pitch: -20, pupil_x: -15, pupil_y: 0}, and so on, until we have all 45 combinations stored in an array.
Calling the AI Model and Saving Each Generated Image
Now for the most important part - actually calling the AI model to generate each image and saving it to our local machine. We'll create a function called generateImage that takes one set of parameters and produces one image:
async function generateImage(params: ImageParams) {
    // First, construct a descriptive filename based on the parameters
    const filename = `image_pitch${params.rotate_pitch}_px${params.pupil_x}_py${params.pupil_y}.webp`;
    const filepath = path.join("generated-images", filename);

    // If this image already exists, skip it so we don't waste API credits re-generating it
    if (fs.existsSync(filepath)) {
        console.log("Skipping existing:", filename);
        return;
    }

    console.log("Generating:", filename);

    // Call the Replicate API to run the expression-editor model
    const output = await replicate.run(
        "fofr/expression-editor:bf913bc90e1c44ba288ba3942a538693b72e8cc7df576f3beebe56adc0a92b86",
        {
            input: {
                image: IMAGE_URL,
                rotate_pitch: params.rotate_pitch,
                pupil_x: params.pupil_x,
                pupil_y: params.pupil_y,

                // Keep all other facial expression parameters at neutral/zero
                // so we don't accidentally add smiles, winks, etc.
                aaa: 0,
                eee: 0,
                woo: 0,
                wink: 0,
                blink: 0,
                smile: 0,
                eyebrow: 0,
                src_ratio: 1,
                rotate_yaw: 0,
                rotate_roll: 0,
                crop_factor: 2.5,
                sample_ratio: 1,
                output_format: "webp",
                output_quality: 95,
            },
        }
    );

    // The model returns an array with one file object
    // We need to convert it to a buffer and save it to disk
    const file = output[0] as any;
    const buffer = Buffer.from(await file.arrayBuffer());
    fs.writeFileSync(filepath, buffer);
}
First, we construct a filename that describes the parameters used - this makes it easy to identify which image is which later. For example, an image might be named image_pitch-10_px15_py0.webp, which tells us it has the head tilted slightly down (pitch -10), eyes looking right (pupil_x 15), and eyes centred vertically (pupil_y 0).
Before we generate anything, we check if this file already exists. This is really important because if you need to stop and restart your script for any reason, you don't want to waste time and API credits regenerating images you already have.
Then we call replicate.run() with the model ID and all our parameters. Notice how we're setting our three key parameters (rotate_pitch, pupil_x, pupil_y) to the values we want, but we're also explicitly setting all the other expression parameters to 0 or their neutral values. This ensures we get a neutral expression with just the head and eye positions we want - no accidental smiles or winks.
Finally, we take the output from the model, convert it to a binary buffer, and write it to a file in our generated-images folder.
Wiring It All Together in the Main Function
Now let's create our main function that ties everything together and actually runs the generation process:
async function main() {
    // Create the output folder if it doesn't exist yet
    if (!fs.existsSync("generated-images")) {
        fs.mkdirSync("generated-images");
    }

    // Get all the combinations we need to generate
    const combos = getCombinations();

    // Loop through each combination and generate its image
    for (const combo of combos) {
        try {
            await generateImage(combo);
            // Add a small delay between requests to avoid hitting rate limits
            await new Promise((r) => setTimeout(r, 3000));
        } catch (e) {
            console.error("Error generating image", combo, e);
        }
    }
}

main().catch(console.error);
This main function orchestrates the entire generation process. First, it makes sure we have a generated-images folder to store our output. Then it gets all 45 combinations from our getCombinations() function and loops through each one, calling generateImage() for each combination.
I've wrapped each generation call in a try-catch block so that if one image fails to generate for some reason, the script will log the error and continue with the rest. I've also added a 3-second delay between each API call - this is important to avoid hitting Replicate's rate limits.
Now you can run the script! In your terminal, type:
npm run start
This will take a while - probably 10 - 15 minutes to generate all 45 images. You'll see console messages as each image is generated. When it's done, you'll have a folder structure that looks like this:
generated-images/
  image_pitch-20_px-15_py-15.webp
  image_pitch-20_px-15_py0.webp
  image_pitch-20_px-15_py15.webp
  ...
  image_pitch20_px15_py15.webp
This is essentially our "sprite sheet" - except instead of being packed into one big image file, we have each frame as a separate file, which makes it easier to work with in the browser.
Building the Basic HTML Structure
Now that we have all our generated face images, it's time to build the web page that will display them and make the face follow the cursor. The front-end is surprisingly simple - it's just a single HTML file with a bit of JavaScript embedded in it. The HTML file needs:
- A container element where all our face images will be stacked on top of each other.
- Some JavaScript code that:
- Preloads all 45 images so they're ready to display instantly.
- Tracks the user's mouse movement across the screen.
- Figures out which image best matches the current mouse position.
- Shows only that one image while hiding all the others.
Let's start with the absolute bare minimum HTML structure. Create a new file called index.html in your project folder and add this code:
<!DOCTYPE html>
<html lang="en">
    <head>
        <meta charset="UTF-8" />
        <title>Eye Tracking Face</title>
        <meta name="viewport" content="width=device-width, initial-scale=1.0" />
    </head>
    <body>
        <div id="loading">
            <div id="progress-text">Loading images... 0%</div>
        </div>

        <div id="instructions">Move your mouse around (or tilt your phone) to make the face follow you.</div>

        <button id="motion-button">Enable Motion Tracking</button>

        <div id="image-container"></div>

        <script>
            const pitchValues = [-20, -10, 0, 10, 20];
            const pupilXValues = [-15, 0, 15];
            const pupilYValues = [-15, 0, 15];

            const images = [];
            for (const pitch of pitchValues) {
                for (const pupil_x of pupilXValues) {
                    for (const pupil_y of pupilYValues) {
                        const filename = `image_pitch${pitch}_px${pupil_x}_py${pupil_y}.webp`;
                        images.push({ pitch, pupil_x, pupil_y, filename });
                    }
                }
            }

            const container = document.getElementById("image-container");
            const loading = document.getElementById("loading");
            const progressText = document.getElementById("progress-text");
            const motionButton = document.getElementById("motion-button");

            const imageElements = new Map();
            let loadedCount = 0;

            // Preload all images
            images.forEach((imgInfo) => {
                const img = new Image();
                img.src = `./generated-images/${imgInfo.filename}`;
                img.onload = () => {
                    loadedCount++;
                    progressText.textContent = `Loading images... ${Math.round((loadedCount / images.length) * 100)}%`;
                    if (loadedCount === images.length) {
                        loading.classList.add("hidden");
                        // Show center image initially
                        showClosestImage(0, 0);
                    }
                };
                img.onerror = () => {
                    loadedCount++;
                };

                img.dataset.pitch = imgInfo.pitch;
                img.dataset.pupilX = imgInfo.pupil_x;
                img.dataset.pupilY = imgInfo.pupil_y;

                container.appendChild(img);
                imageElements.set(imgInfo.filename, img);
            });

            let currentActive = null;

            function showImageByInfo(info) {
                const filename = info.filename;
                const img = imageElements.get(filename);
                if (!img) return;

                if (currentActive) {
                    currentActive.classList.remove("active");
                }
                img.classList.add("active");
                currentActive = img;
            }

            // Helper: map [-1, 1] to nearest value in array
            function nearestInRange(value, values) {
                const min = values[0];
                const max = values[values.length - 1];
                const mapped = min + ((value + 1) / 2) * (max - min);
                let best = values[0];
                let bestDist = Infinity;
                for (const v of values) {
                    const d = Math.abs(v - mapped);
                    if (d < bestDist) {
                        bestDist = d;
                        best = v;
                    }
                }
                return best;
            }

            function showClosestImage(normX, normY) {
                // normX, normY are from -1 to 1
                const pupil_x = nearestInRange(normX, pupilXValues);
                const pupil_y = nearestInRange(-normY, pupilYValues); // invert so up = negative
                const pitch = nearestInRange(-normY, pitchValues);

                const match = images.find(
                    (img) => img.pupil_x === pupil_x && img.pupil_y === pupil_y && img.pitch === pitch
                );
                if (match) {
                    showImageByInfo(match);
                }
            }

            // Mouse tracking (desktop)
            window.addEventListener("mousemove", (e) => {
                const rect = container.getBoundingClientRect();
                const cx = rect.left + rect.width / 2;
                const cy = rect.top + rect.height / 2;

                // -1..1 based on distance from center
                let normX = (e.clientX - cx) / (window.innerWidth / 2);
                let normY = (e.clientY - cy) / (window.innerHeight / 2);

                normX = Math.max(-1, Math.min(1, normX));
                normY = Math.max(-1, Math.min(1, normY));

                showClosestImage(normX, normY);
            });

            // Device motion (mobile)
            function isMobile() {
                return /Android|iPhone|iPad|iPod/i.test(navigator.userAgent);
            }

            async function enableMotion() {
                try {
                    if (
                        typeof DeviceOrientationEvent !== "undefined" &&
                        typeof DeviceOrientationEvent.requestPermission === "function"
                    ) {
                        const perm = await DeviceOrientationEvent.requestPermission();
                        if (perm !== "granted") return;
                    }

                    window.addEventListener("deviceorientation", (event) => {
                        const beta = event.beta || 0; // front/back tilt (-180..180)
                        const gamma = event.gamma || 0; // left/right tilt (-90..90)

                        // Map tilt to -1..1 range
                        const normX = Math.max(-1, Math.min(1, gamma / 45)); // left/right
                        const normY = Math.max(-1, Math.min(1, beta / 45)); // up/down

                        showClosestImage(normX, normY);
                    });

                    motionButton.classList.add("hidden");
                } catch (e) {
                    console.error(e);
                }
            }

            if (isMobile()) {
                motionButton.classList.remove("hidden");
                motionButton.addEventListener("click", enableMotion);
            } else {
                motionButton.classList.add("hidden");
            }
        </script>
    </body>
</html>
I've excluded the CSS styling in the example above since the code snippet is already long, but feel free to look at the GitHub project attached at the end of the post to see how I styled it. The important part of the snippet above is the JavaScript at the bottom, where we're setting up our data structures. We're recreating the same list of image combinations we generated earlier, and we're initialising a Map to store references to the actual image elements once we create them.
Preloading All the Images and Displaying Only One at a Time
The next crucial step is to preload all 45 images into the browser's memory. We want to do this upfront so that when the user moves their mouse, we can instantly swap between images without any loading delay or flicker. Let's add functions to handle this. Add this code to your <script> section:
<script>
    // ... (previous code) ...

    function preloadAllImages() {
        return new Promise((resolve) => {
            let loaded = 0;
            const total = images.length;

            images.forEach((info) => {
                const img = new Image();
                img.src = `./generated-images/${info.filename}`;
                img.style.position = "absolute";
                img.style.top = "0";
                img.style.left = "0";
                img.style.width = "100%";
                img.style.height = "100%";
                img.style.objectFit = "contain";
                img.style.display = "none"; // hidden by default

                img.onload = () => {
                    loaded++;
                    if (loaded === total) resolve();
                };

                const key = `${info.pitch}_${info.pupil_x}_${info.pupil_y}`;
                imageElements.set(key, img);
                container.appendChild(img);
            });
        });
    }

    function showImage(key) {
        if (currentKey && imageElements.has(currentKey)) {
            imageElements.get(currentKey).style.display = "none";
        }
        if (imageElements.has(key)) {
            imageElements.get(key).style.display = "block";
            currentKey = key;
        }
    }
</script>
The preloadAllImages() function creates a new Image element for each of our 45 generated files. It sets the source of each image to point to the corresponding file in our generated-images folder. Crucially, it positions all these images absolutely at the exact same location (top-left corner of the container) so they'll stack perfectly on top of each other.
The function returns a Promise that resolves once all images have finished loading. This is important because we don't want to start showing images to the user before they're all ready -that would result in broken image icons or loading spinners.
The showImage() function is simple - it hides whatever image is currently visible and shows the image corresponding to the key we pass in. The key is a string like "0_0_0" (for the neutral position) or "-10_15_0" (for head tilted slightly down, eyes looking right, vertical eye position neutral).
Now let's add an initialisation function that preloads everything and shows the neutral face to start with:
<script>
    // ... (previous code) ...

    async function init() {
        await preloadAllImages();
        showImage("0_0_0"); // pitch=0, pupil_x=0, pupil_y=0
    }

    init();
</script>
With this code in place, when you open your HTML file in a browser, it will load all 45 images and then display the neutral face (looking straight ahead). But it won't follow your mouse ye -that's what we'll implement next.
Mapping Mouse Position to the Correct Image
Here's where the magic really happens. We need to convert the user's mouse position into our three-dimensional parameter space (pitch, pupil_x, pupil_y) and then find the closest image in our library that matches those parameters. Let's break this down into manageable steps:
- First, we'll convert the mouse's X and Y coordinates into a normalised range from
-1to1, where0represents the center of the screen. - Then we'll use those normalised values to calculate target values for our three parameters.
- Finally, we'll "snap" to the nearest values that we actually have in our generated image set.
Add this code to your script section:
<script>
    // ... (previous code) ...

    function nearest(value, allowed) {
        return allowed.reduce((prev, curr) => (Math.abs(curr - value) < Math.abs(prev - value) ? curr : prev));
    }

    function updateFromMouse(mouseX, mouseY) {
        const centerX = window.innerWidth / 2;
        const centerY = window.innerHeight / 2;

        // -1..1
        let offsetX = (mouseX - centerX) / centerX;
        let offsetY = (mouseY - centerY) / centerY;

        offsetX = Math.max(-1, Math.min(1, offsetX));
        offsetY = Math.max(-1, Math.min(1, offsetY));

        const targetPupilX = offsetX * 15; // full range [-15, 15]
        const targetPupilY = -offsetY * 15; // invert so up = negative
        const targetPitch = offsetY * 20; // [-20, 20]

        const snapPitch = nearest(targetPitch, pitchValues);
        const snapPupilX = nearest(targetPupilX, pupilXValues);
        const snapPupilY = nearest(targetPupilY, pupilYValues);

        const key = `${snapPitch}_${snapPupilX}_${snapPupilY}`;
        showImage(key);
    }

    window.addEventListener("mousemove", (e) => {
        updateFromMouse(e.clientX, e.clientY);
    });
</script>
When the user moves their mouse, we receive the absolute X and Y coordinates of the cursor. But what we really need to know is: "how far is the cursor from the center of the screen, and in which direction?"
So we calculate offsetX and offsetY, which represent the mouse position relative to the screen center, normalised so that -1 means "all the way to the left/top" and 1 means "all the way to the right/bottom". The center of the screen is 0 for both.
Then we multiply these normalised offsets by our parameter ranges. For horizontal eye movement (pupil_x), we simply multiply by 15. For vertical eye movement (pupil_y), we multiply by 15 but also negate it, because in screen coordinates, positive Y goes downward, but in our face model, we want positive values to look upward. For head pitch, we multiply by 20 to get the full range of head tilts.
We don't have an image for the exact calculated values. For example, the calculation might give us pupil_x = 7.3, but we only generated images for pupil_x values of -15, 0, and 15. So we use our nearest() helper function to snap to the closest value we actually have. In this example, 7.3 would snap to 15.
Finally, we construct a key string from the three snapped values and call showImage() to display it. Because all our images are already preloaded and positioned in exactly the same spot, this swap happens instantly - there's absolutely no flicker or loading delay. It's just an immediate switch from one <img/> element being visible to another.
Adding Device Tilt Support for Mobile
If you want to make this even cooler on mobile devices, you can add support for device orientation so the face follows the tilt of the phone rather than (or in addition to) the cursor position. Modern smartphones have built-in accelerometers and gyroscopes that can detect how the device is tilted in space.
However, there's an important privacy consideration here - most modern browsers require explicit user permission before they'll allow a website to access device orientation data. This means we need to:
- Serve the page over
HTTPS(not justhttp://) - Ask the user to grant permission, typically by having them tap a button
Here's the general flow for implementing this:
- Detect if the user is on a mobile device
- Show a button that says something like
"Enable Motion Tracking" - When the user taps the button, request permission to access device orientation
- If permission is granted, start listening to
deviceorientationevents - Convert the device's tilt angles (
betafor front/back tilt andgammafor left/right tilt) into our normalised[-1, 1]range, similar to how we handled mouse coordinates
Here's what the code might look like (add this to your script section):
async function enableMotion() {
    // On iOS, we need to explicitly request permission
    if (typeof DeviceOrientationEvent?.requestPermission === "function") {
        try {
            const perm = await DeviceOrientationEvent.requestPermission();
            if (perm !== "granted") {
                alert("Permission denied. Motion tracking won't work.");
                return;
            }
        } catch (err) {
            console.error("Error requesting device orientation permission:", err);
            return;
        }
    }

    // Start listening to device orientation changes
    window.addEventListener("deviceorientation", (event) => {
        // beta: front-to-back tilt in degrees, where:
        //   0 = device is lying flat
        //   positive = top of device tilted away from you
        //   negative = top of device tilted toward you
        const beta = event.beta || 0;

        // gamma: left-to-right tilt in degrees, where:
        //   0 = device is lying flat
        //   positive = device tilted to the right
        //   negative = device tilted to the left
        const gamma = event.gamma || 0;

        // Normalize to -1..1 range (assuming tilt up to 45 degrees in any direction)
        const normX = Math.max(-1, Math.min(1, gamma / 45));
        const normY = Math.max(-1, Math.min(1, beta / 45));

        // Use the same mapping logic as we did for mouse movement
        const targetPupilX = normX * 15;
        const targetPupilY = -normY * 15;
        const targetPitch = normY * 20;

        // Snap to nearest values and show the image
        const snapPitch = nearest(targetPitch, pitchValues);
        const snapPupilX = nearest(targetPupilX, pupilXValues);
        const snapPupilY = nearest(targetPupilY, pupilYValues);

        const key = `${snapPitch}_${snapPupilX}_${snapPupilY}`;
        showImage(key);
    });

    console.log("Motion tracking enabled!");
}
Then, in your HTML body, you could add a button like this:
<button onclick="enableMotion()" style="position: fixed; top: 20px; left: 20px; z-index: 1000;">
    Enable Motion Tracking
</button>
When the user taps this button on their phone, they'll see a permission dialog, and once they grant permission, the face will start following the tilt of their device. It's a really cool effect when you're showing this to friends - they can physically tilt their phone around and watch the face track their movements!
Conclusion
I hope this detailed walkthrough has given you the confidence to build your own version of this effect or apply these techniques to other creative projects. Have fun experimenting, and feel free to share what you create! To explore the full implementation, styling, and code structure, check out the complete project on GitHub here.
Further Reading
Explore more articles that might interest you.